Friday, October 26, 2012

Beautiful Butternut

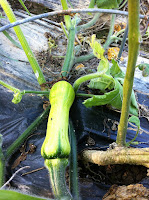
After fighting the horrid squash bugs and elusive deer, my Argonaut Butternut squash plants were able to produce only two fruits.  But they were huge!  The plants themselves would start dying, only to show vigorous growth effort farther down the vine.  Before our early first frost there were several female flowers trying to be fruitful.  Those pesky deer munched all but one, and now I can't find it.  But, c'est la vie.


Missing squash
Tenacious plants
More flowers


Well, after that first surprise frost I realized I left the butternut squashes on the porch.  Fearing they might have been damaged by the frost, I brought them inside and cooked 'em up to freeze for making soup and bread.  Below is my photo journal of the process.


Add caption

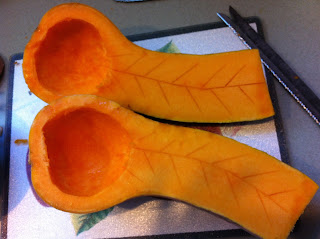
I cut the squash in half so that they will lie as level as possible.  I also cu off the top of the squash where the stem was.  The seeds and "guts" are much like a pumpkin, but with a tad less of the slime factor.  

In the picture you'll notice the tree-like cuts I made in the pulp.  Doing this allows the squash to cook more evenly.  It also allows for the seasoning I put in the "bowl" to spread through the stem as the pulp softens.


To give you an idea of how big these squash were, the cookie sheets I cooked them on are about 15 inches long.  


In the "bowl" of the squash I put butter, vanilla, brown sugar, cinnamon, nutmeg, and cloves.  The kicker is that I don't measure any of these.  I do it by sight guestimation depending on the size and depth of the bowl.  Once everything is a simmery, aromatic pool of sweetness I like it to fill the bowl about one-third to half-way full.  

I slide them into the gaping maw of my 350 degree oven and forget about them.  About forty-five minutes to an hour later the sugary bouquet of and Autumnal kitchen will remind me of my squash.  (I like to cook them until I can use a regular table spoon to scrape the meat from the skin.)


Scoop out the meat, plop it in the food processor (or a blender if you lack Ninja capabilities), and puree it until it's a sweet, sticky blob of creamed winter squash that needs many more ingredients until it can be given the title of yummy.  The two I harvested from my garden yielded what you see here.  I do believe this is a 4-quart mixing bowl.


First loaf of butternut squash bread
I immediately attempted my first altered pumpkin bread recipe.  Altered, because the squash was cooked with partial portions of many of the ingredients required.

The first batch, eh, not so good.  The second, with more brown sugar and cinnamon than the first, plus raisins. . . delicious!  And a big hit at my Pampered Chef party, too. 

(Little tip, lightly coat your raisins in flour to keep the suspended in the batter so they don't sink to the bottom of your loaf.)


I also make soup every year for Thanksgiving.  I use the creamed, seasoned squash combined with chicken broth, and canned milk.  Another quirk besides my aversion to measuring, sometimes I use evaporated milk, and sometimes I use condensed milk.  Condensed milk is much sweeter and thicker, and seems to make the soup more preferable to my family.  For that super extra yumminess drizzle the ever-expensive white truffle oil over the bowl before serving.  A little trick I learned in Chattanooga.  (Use the evaporated milk if you go this route.) 

For the seeds, I washed them in a colander and laid them out on a paper towel-covered cookie sheet to dry.  I plan to use them to bro my squash next season, and I have enough--as you can see--to share with my friends.


As for storage of the remaining squash goo, I put it in two-cup portions into FoodSaver bags.  I was pretty happy that they all came out the same size since I made them from a roll.  


Butternut squash is a great substitute for pumpkin, as are most winter squashes.  It has more flavor, and can be used to make a more eclectic collection of recipes.  (Did you know that canned "pumpkin" is nothing of the sort?  It's winter squash.  Libby's actually uses a variety that they created and have patented.)

So go a little butter-nutty this Autumn!

Tuesday, September 11, 2012

Gourd Toad House. . .

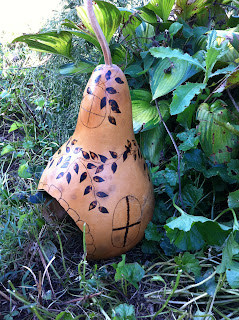
My first gourd project was probably a bit ambitious for a beginner, but the little toads that visit my deck on a nightly basis inspired me.

I don't care much about the stains caused by the weathering of the gourd.  I think they add character.  Besides, I don't yet have stain or dye for adding color, so. . .  But anyway, below is is a photographic journey taking you through the process of my gourdy adventure almost from start to finish.

I do wish I had had the insight to take pictures from the very beginning, but alas.  I picked a gourd--from my 37--that was medium in size, fairly straight, and well-balanced.  (The balance part didn't really seem important until recently when I was cleaning more gourds and noticed that two of them don't sit very well.)  It was also pretty clean compared to some of the other ones in the bunch.

To clean the outside of the gourd I just used my kitchen sink.  I filled it with water, a little bit of dish soap, and bleach.  The bleach not only helps with the removal of mold spots, it also bleaches them out a bit, adding some consistency to the color.  An extra benefit is the antifungal and antimicrobial benefits that will last long after the gourd has dried.

The cleaning action needs to be abrasive, so I used steel wool.  I had some some issues, the most annoying of which was the smell.  Steel wool stinks when it gets wet.  It also rusts almost instantly, which feels really gross on bare hands.  (For the next batch of gourds, I used copper pads for scrubbing pans.  And rubber gloves.)  But the steel wool worked for my impatience.

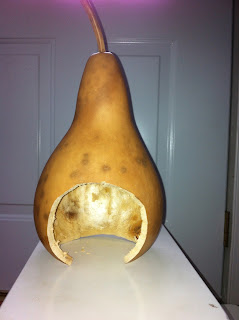
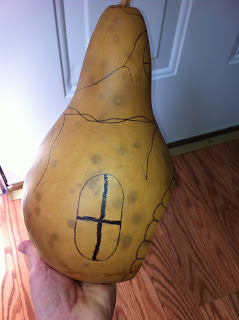
Once the gourd was dry, I drew the door and bottom hole for my toad house.
Toad House Door
Then I drilled guide holes for sawing the pieces out.  Lots of guide holes.
Guide Holes for Bottom Hole
I used an Exacto hand saw to cut out the base.  It was tedious work that would be much easier with a power handheld jig saw.  But that's why I drilled so many guide holes.

Inside the gourd can be a number of different types of yucky seed and guts material.  This gourd wasn't too bad, as most of the yucky stuff just dumped out.  This being my first time, I tried a few different things for cleaning out the remaining yuck.  I soaked and scraped.  I scraped it dry.  I sanded.  In the end, I decided that it's only a toad house and doesn't have to be perfect.  (I've found other tools used with a power drill that will really clean out the insides.)
Base Hole
Bug with the Gourd
Bug with the Gourd


Checking Out the Holes
          
Silly Boy


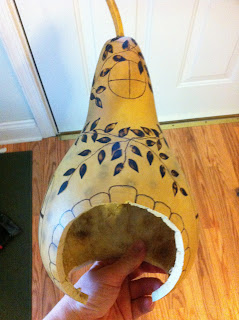
I cut the hole for the door the same way.  Then I scraped the inside some more.
Door Hole (no flash)
Door Hole (with flash)

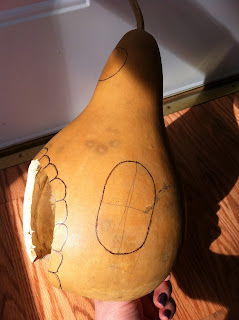
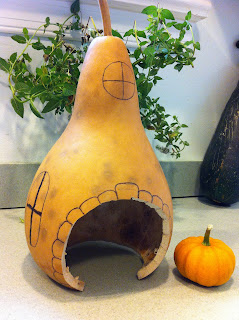
I drew a few windows in different shapes before settling on two ovals on the sides and a circle in the top center.  (Here I must toot my horn:  I drew that circle freehand the first time.  **smiles**)  I thought the door looked a little naked, so I sketched some "stone" work around it.

After waiting a while, looking at the pencil marks on my gourd, I finally broke out the wood burner.  After getting halfway around the door, I was informed that the odor was noticeable by the steps.  (I was so impatient, I started burning at the dining room table around 11 o'clock one night.)  The next day I sat under the ceiling fan in the sunroom and finished tracing my pencil lines with the tapered burning tip.  (An observation:  The tapered point, while giving a fine line for more detail, is better for those finer details than outlines.  It's just not quite dark enough.)  

Door & Center Window Burned


Side Window Burned
(with penciled pickets)

Side Window Burned
(with penciled pickets)
 I used the tapered point to burn the pickets in the circular window in order to keep it's delicacy.  But the oval windows needed pickets with more umph.  I really just wanted them to be wider, so I used the calligraphy tip.  It was the perfect width for the pickets, but they came out a little dark and with a striped look.  It's okay for a beginner, but next time I'll try to outline and shade them instead.
Pickets Burned in Windows

Pickets Burned in Wind

First Showcase Photo
Showcase with a Pumpkin


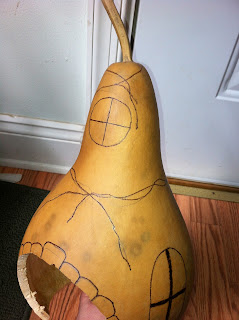
I thought it still looked naked.  Like it needed something in that big empty space between the door and the top window.  I pictured a vine draping around the bottom of the neck like a scarf.  But I have issues with symmetry in art, so I didn't want a vine hanging on each side of the door.  A piece in the middle would solve that problem.  It was a bit complicated, but I got it so there were no stray pieces that had no source.  The source then be came an issue, so. . .
Vines Burned

Vines Burned


. . . I trailed the vines down to the base of the gourd, fattening them up at the bottom.  This was they look like they're growing around the toad house instead of just draped around the neck like a scarf.
Source of Vines Burned
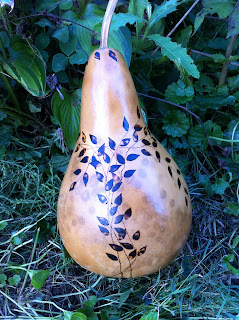
Obviously, the vines look slightly puny--and like I  burned a bunch of scraggly lines all over the gourd--with any leaves.  Leaves could be hard.  However, there is a burning tip that is used for shading, and it just happens to be shaped like a leaf.  My idea was to use the flat side to burn leaves onto my vines, and I am super happy with the results.
Front View with Leaves Burned


Stage Left with Leaves Burned


Stage Right with Leaves Burned
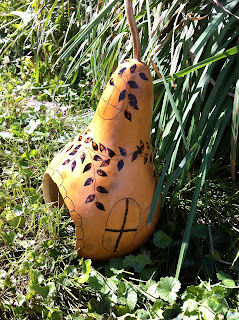
(This is my favorite side.)


Rear View with Leaves Burned
 I had to pose it on my hutch with my Autumn gourds. . .


But it still wasn't finished.  The door and bottom hole needed to be filed smooth.  You may have noticed the chip mark in the keystone above the door.  That was a drill hole, and I wanted it gone.  But, I couldn't fine my small rasps for just such a purpose.  It took me searching through Hubby's tool box--where last I saw said rasps--for him to help me look.  He didn't find my flat ones, but he did find a round one.  Beggars can't be choosers, so I made do.  It worked pretty well.  I was able to smooth the sharp and rough edges along the openings, and did a decent job with the chip in the keystone.

My toad house also needed a good rub down with mineral oil to protect it from the elements.  To this point I have done three applications, but there are still areas where I can see that it needs more.  (Gourds can have different rates of absorption across the shell.  They can also be harder to burn in different areas, like around the stem.)  The inside being the most absorbent part, I actually poured the oil inside, rolled it around for more even coating, and rubbed it in.  The slight sheen you can see in the pictures below is from the oil.

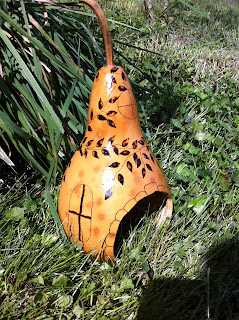
So, aside from a few more coats of mineral oil, my first gourd project is complete!  Below I have pictures of it in it's "natural" element. . . the garden.  I hope you liked it.  I am very proud of myself for this accomplishment.  I couldn't be happier.
In Sun
In Sun


In Sun

In Sun


In Shade

In Shade


In Shade
In Shade


Monday, August 27, 2012

Devastation Leads to Depression. . .

I know I've been slacking hard core with this blog, and I apologize for the lack of information.  It's just that my garden has been very depressing these last few weeks.

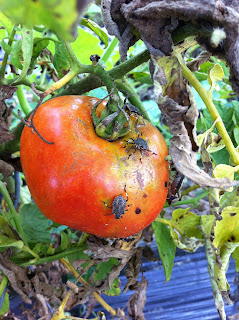
Stink bug damage
Stink bug damage
Stink bug damage
Stink bugs on tomato
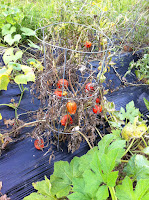
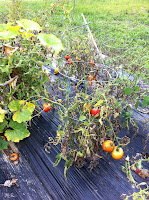
When I go out to harvest my tomatoes, or what's left of them, I want to cry.  The cucumbers and squash I expect to die off about now.  Although the squash seem to die and come back, die and come back, I never expected to be harvesting from them as late as now.  The cucumbers gave me more than enough to make several batches of bread and butter and dill pickles.  The green beans have also run their course, which is upsetting, but I got plenty blanched and in the freezer.

But my tomatoes should be in full swing still.  Yet the fruits are rotting, and the plants are dying.  All because of one bug.  Or rather, hundreds of one species.  Stink bugs!  I hated them being in my house, but I loathe them in my garden.  They are devastating my tomato crops.  Their bite sending toxins into the fruits and plants that start as a bruise, then rots the affected plant from the inside, out.  And my poor plants are literally crawling with them.

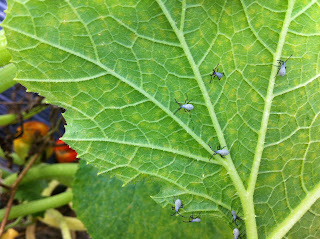
Young squash bugs on underside of yellow squash leaf


The other problem in my garden revolves around my squash.  The summer squash, as I said, have been cycling through a die-and-revive sort of pattern, giving me plenty of fruit to harvest along the way.  I expected them to be gone  by now, but they are promising at least one more harvest. . . if I can solve the problem.  The winter squash and watermelons have me worried.  The pest infesting them can be just as devastating to my pumpkins, watermelons, and butternut squash as those bleeping stink bugs are to the tomatoes.  Squash bugs!  


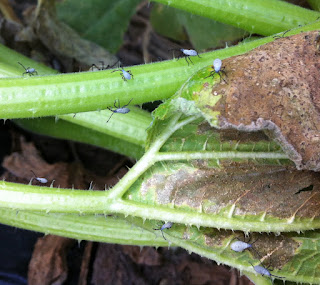
These pests did a fair job of destroying my pumpkins last year.  This year I noticed them much earlier.  These little suckers eat the fruits and vines, causing the plants to die a slow death.  All of the Cucurbita plants are affected by the squash bugs, along with the watermelons and gourds.

Young squash bugs
To my great chagrin, I sprayed the entire garden with Sevin.  Sevin is a Carbaryl pesticide that is effective on a number of pests.  As it was the only thing listed for both stink and squash bugs, I went with it.  It also comes highly recommended by my neighbor, whose advice I take very seriously.  I never want to add chemicals to my garden, but there are times when you just have to squeeze the trigger.  Unfortunately, I think I may have waited too long.  The bugs are far from gone.

Through all of this, I hold fast to the hope that my butternut squash and pumpkins will survive.  Once my gourds are harvested, I will pull the plastic up and see if I can treat the ground so the bugs can't overwinter in my garden.  I believe that is why they are so bad this year, because I left the plastic down all winter.  Of course it didn't help that the last winter was weak, and the ground never froze.  But the plastic must come up.  My research so far definitely shows that.  Those little buggers can survive the winter hiding in mulch. . . and under plastic.
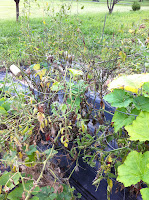
Squash bug damage to butternut (large yellow leaves)
and watermelon (dying vines)

I'd rather have hornworms.


And the gourds, while looking a bit sickly, will survive with minimal damage.  They are a hard-shelled variety, and seem to be very pest resistant.
Yellowing of gourd plants due to squash bugs